
How To..
How To Convert Point Cloud to 3D Model in AutoCAD
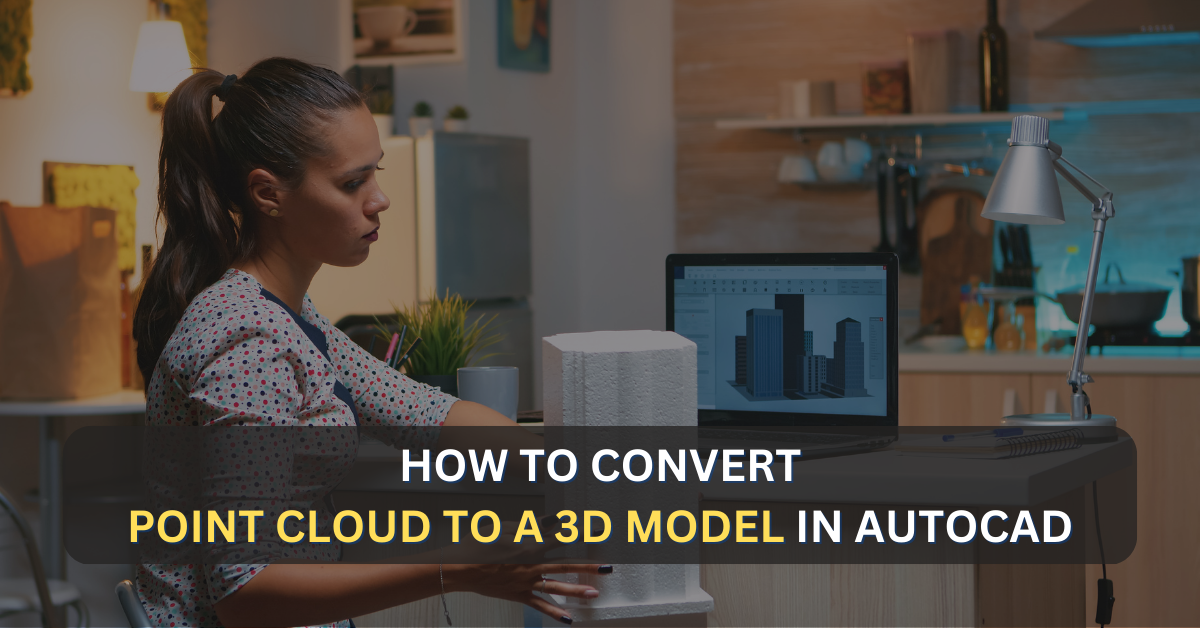
Read how to convert point cloud to 3d model AutoCAD software. Know the step-by-step guide. Know in detail here.
AutoCAD is a widely used CAD software that allows architects, engineers, and designers to create detailed 2D and 3D designs.
The software also offers a range of tools for processing and analyzing point cloud data, making it possible to convert point cloud data into 3D models.
In this article, we’ll explore the process of convert point cloud to 3D model AutoCAD and discuss some of the benefits and limitations of this process.
Also Read, Point Cloud to 3D Model Conversion for Improved Efficiency
What is a Point Cloud?
A point cloud is a set of data points in a three-dimensional space that represent the external surface of an object.
Point clouds are generated by 3D laser scanning technology and can be used to create highly accurate 3D models of physical objects.
In the world of architecture, engineering, and construction (AEC), point clouds are used to create accurate digital models of buildings and structures for renovation, retrofitting, and documentation purposes.
Why Convert Point Cloud to 3D Model AutoCAD?
There are several reasons why you might want to convert point cloud to 3D models in AutoCAD.
First, point clouds can be used to create highly accurate 3D models of objects, which can be useful for design, analysis, and documentation purposes.
Additionally, convert point cloud to 3D model AutoCAD makes it possible to work with the data in a familiar environment, allowing you to leverage AutoCAD’s powerful tools and features to manipulate and analyze the data.
Step-by-Step Guide to Convert Point Cloud to 3D Model in AutoCAD
The process of converting point cloud to 3D model in AutoCAD is straightforward and can be completed in a few simple steps.
Here is a step-by-step guide to assist you to get started:
1 – Import the Point Cloud Data
The first step is to import the point cloud data into AutoCAD. You can do this by selecting “Import” from the “File” menu and choosing the appropriate file format for your point cloud data.
2 – Convert the Point Cloud to a 3D Mesh
Once the point cloud data has been imported into AutoCAD, you can convert it to a 3D mesh.
To do this, select “3D Object” from the “Create” menu and choose “From Point Cloud.” AutoCAD will generate a 3D mesh from the point cloud data, which you can then manipulate and refine as needed.
3 – Clean Up and Refine the 3D Mesh
The next step is to clean up and refine the 3D mesh generated from the point cloud data. You can do this by using tools such as “Erase” and “Trim” to remove unwanted or extraneous parts of the mesh.
You can also use tools such as “Smooth” and “Join” to improve the quality of the mesh and create a more accurate representation of the object.
4 – Export the 3D Model
Once you’re satisfied with the 3D mesh, you can export it as a 3D model. To do this, select “Export” from the “File” menu and choose the appropriate file format for your needs.
Introduction
We know that custom home building can be a bit tricky. The process is time-consuming and requires a lot of patience, but the end result is amazing. There are so many details to take into consideration when designing your home, and finding the right contractor is essential if you want to get it exactly right. Here are five tips we’ve learned over the years from our experience working with contractors:
Build to your specifications
As a custom home builder, we know that your home is more than just a place to live. Your home should be built to your specifications and you can choose the floor plan, layout, and finishes to make it exactly how you want. You can also choose the size of the home and lot so everything fits together perfectly.
Budget for the extras
You’ll want to budget for the extras. This is especially true if you’re building a custom home or renovation project, where every little detail will be customized according to your specifications. You might think that all of your needs are covered by the amount of money that you’ve agreed on during negotiations with the builder, but then something unexpected comes up–like adding another room or changing an electrical outlet configuration–and it becomes clear that there will be extra costs involved. The good news is that these hidden costs tend not to be large; they just add up slowly over time as more work gets done on different parts of the house or remodel project.
The best way to avoid these sorts of surprises is by being prepared from the start: have a spreadsheet detailing all of these things so everyone knows exactly what kind (if any) alterations need doing later on down the line when needed; make sure everyone knows exactly why each change was made originally; discuss which parts need updating first (such as flooring); ask people what their thoughts might be about certain features before making final decisions about them…the list goes on! If you do this enough times then it becomes second nature–and much easier than guessing without knowing anything about how many rooms exist within each type available at various price points.”
Take your time to find the right contractor
- Find a contractor who has experience with your type of home.
- Ask for references and make sure to check them out thoroughly.
- Get a detailed quote from different contractors before deciding on one, so that you have an idea of what it will cost in advance.
- Ask if the contractor is licensed or registered with your state’s licensing board, since some people are better at certain types of jobs than others (and even within the same company).
Stay on top of trends in custom home renovations
When you’re building a home, it’s important to stay on top of trends in custom home renovations. As new products come out and old ones get replaced, you want to be sure that your renovation is up-to-date with the latest styles and technologies available.
To help guide you through this process, here are some examples of what we consider some of the hottest trends in custom home renovations:
Custom a guest bathroom is not easy.
The guest bathroom is the first room people see when they enter your home. It should be clean and inviting, easy to use, have a theme and look great.
Here are some examples of themes for the guest bathroom:
- Coastal décor with white tile floors, blue accents, coastal artwork on the walls and accessories like seashells or palm trees in vases around the room
- Countryesque decor such as dark wood cabinets with hardware in antique gold tones (gold hardware looks great with all types of colors)
Don’t go with the first contractor you find
When you’re looking for a custom home renovation company, there are a few things to keep in mind. The first is that you want to find one that has been in business for a while and has built up its reputation over time. The second thing is that you want to make sure the company has a good portfolio of work and can show examples of their work on display at their office or website. Thirdly, it helps if the contractor will be willing to work with you as an individual customer rather than just another client–there are some companies who only want people who have large budgets and don’t care about what happens after they sign on the dotted line (which means no follow-up calls).
Finally, if possible try not just anyone who offers services similar to yours; sometimes there may be reasons why other contractors aren’t worth working with like being too aggressive or not listening closely enough when clients talk about what they need.”
Conclusion
If you’re considering starting a home renovation project, there are many things to consider. You’ll need to find a contractor who can handle it all and makes sure your home stays in good shape throughout the process. But what do you need to know before hiring an architect or builder? Here are some tips for finding the right person for your job:

Investment management is the process of managing assets in order to achieve specific investment goals for an individual or organization. It involves making investment decisions, implementing those decisions, and monitoring the performance of the investments over time. In this article, we will explore the key concepts and strategies of investment management.
The investment management process can be broken down into three key steps: asset allocation, security selection, and performance monitoring. Asset allocation involves determining how to divide investment funds among different asset classes, such as stocks, bonds, real estate, and commodities. This decision is based on an investor’s risk tolerance, investment objectives, and time horizon.
Security selection involves choosing
which specific securities to invest in within each asset class. This decision is based on a variety of factors, including fundamental analysis of the company or asset, technical analysis of market trends, and valuation metrics such as price-to-earnings ratio and dividend yield.
Performance monitoring involves regularly reviewing the performance of the investments and making adjustments as necessary. This includes monitoring market conditions, tracking the performance of individual securities, and evaluating the overall performance of the portfolio.
There are a number of different investment strategies that can be used in investment management. These strategies can be broadly categorized into two groups: passive and active.
Passive investment strategies involve investing in a diversified portfolio of securities with the goal of achieving the returns of a particular market or index. This is done through the use of index funds or exchange-traded funds (ETFs), which are designed to track the performance of a specific market or index. Passive strategies are often used by investors who want to minimize costs and take a long-term investment approach.
Active investment strategies
On the other hand, involve making investment decisions based on a more hands-on approach. Active managers may use fundamental or technical analysis to select individual securities, or may make sector bets based on market trends. Active strategies are often used by investors who are looking to beat the market and achieve higher returns.
One of the most important aspects of investment management is risk management. Managing risk involves understanding the risks associated with each investment and developing strategies to mitigate those risks. This can include diversifying the portfolio across different asset classes and sectors, using hedging strategies such as options or futures, and setting stop-loss orders to limit losses in a particular security.
Another important concept in investment management is asset allocation. Asset allocation involves dividing investment funds among different asset classes in order to achieve a desired level of risk and return. The optimal asset allocation for an investor will depend on their individual risk tolerance, investment objectives, and time horizon.
In addition to traditional asset classes such as stocks and bonds, alternative investments such as real estate, commodities, and private equity can also be used in asset allocation. These investments can offer unique risk and return characteristics and can be used to diversify a portfolio beyond traditional asset classes.
Investment management
Also involves understanding the tax implications of different investments. This includes understanding the tax treatment of different types of income, such as capital gains and dividends, and using tax-efficient investment vehicles such as individual retirement accounts (IRAs) and 401(k) plans.
Finally, investment management involves understanding the role of fees and expenses in investment returns. The fees associated with different investment vehicles can vary widely, and it is important to understand the impact of these fees on investment returns over the long term. This includes understanding the fees associated with mutual funds and ETFs, as well as the fees charged by investment advisors and other financial professionals.
In conclusion
Investment management is a complex process that involves a variety of strategies and concepts. The key to successful investment management is understanding your individual investment goals, risk tolerance, and time horizon, and developing a strategy that is tailored to your specific needs. This may involve a combination of passive and active investment strategies, as well as alternative investments and tax-efficient vehicles. By working
Duct cleaning is the process of removing debris, dirt, and other contaminants from the heating, ventilation, and air conditioning (HVAC) system of a building. While duct cleaning has become increasingly popular in recent years, there are both pros and cons to consider before deciding to have your ducts cleaned. In this guide, we will discuss the pros and cons of duct cleaning Melbourne.
Pros of Duct Cleaning
- Improved Indoor Air Quality
The main benefit of duct cleaning is improved indoor air quality. Over time, dust, dirt, and other contaminants can accumulate in the HVAC system and circulate throughout the building. This can lead to poor indoor air quality, which can cause respiratory problems and other health issues. Duct cleaning can remove these contaminants and improve the overall air quality in the building.
- Increased Energy Efficiency
When debris and contaminants build up in the HVAC system, it can restrict airflow and make the system work harder to heat or cool the building. This can lead to higher energy bills and more frequent repairs. By removing these contaminants through duct cleaning, the HVAC system can work more efficiently, reducing energy costs and extending the life of the system.
- Reduces Allergens and Irritants
Duct cleaning can also reduce allergens and irritants in the air, such as pet dander, pollen, and mold. This can be especially important for people with allergies or respiratory issues.
- Improved System Longevity
Duct cleaning can help to extend the life of the HVAC system by reducing wear and tear on the system. This can lead to fewer breakdowns and repairs, saving money in the long run.
Cons of Duct Cleaning
- Cost
Duct cleaning can be expensive, especially for larger buildings with complex HVAC systems. The cost of duct cleaning will depend on the size of the building and the complexity of the HVAC system. However, the cost can be justified by the benefits of improved indoor air quality, increased energy efficiency, and improved system longevity.
- Unqualified Contractors
One of the major risks of duct cleaning is hiring unqualified contractors who may not have the necessary expertise or equipment to properly clean the HVAC system. This can lead to ineffective cleaning or even damage to the system. It’s important to do your research and choose a reputable contractor with experience in duct cleaning.
- Disruption to Business Operations
Duct cleaning can be a disruptive process, especially for businesses that operate during regular business hours. The cleaning process can be noisy and may require the system to be shut down temporarily. However, many duct cleaning companies can work around business schedules to minimize disruption.
- No Guaranteed Results
While duct cleaning can improve indoor air quality and energy efficiency, there is no guarantee that it will completely eliminate all contaminants from the HVAC system. Some contaminants may be difficult to remove or may reappear over time. However, regular duct cleaning can help to minimize the buildup of contaminants and improve the overall air quality in the building.
Conclusion
Duct cleaning has both pros and cons, and it’s important to carefully consider these factors before deciding whether or not to have your ducts cleaned. While duct cleaning can be expensive and may disrupt business operations, it can also improve indoor air quality, increase energy efficiency, and extend the life of the HVAC system. To minimize risks, it’s important to choose a reputable contractor with experience in duct cleaning and to carefully evaluate the costs and benefits of the service.


13 Possible Reasons Why Your Google Ads Are Not Showing Up
Top 5 $1 Affordable WordPress Hosting Picks

Top: 13 Affordable Cloud Hosting for New WordPress Blog

Data Lakes on AWS: Building Scalable and Cost-Effective Data Lakes Using AWS Infrastructure
How to Prevent Contact Form Spam on WordPress
Maximizing Earnings on TikTok: A Comprehensive Guide for Creators
Do TikTok Users in the USA Receive Payment for Their Content?

Can You Make Money on TikTok in Australia? Building a Successful TikTok Account
Ultimate Guide to Choosing a Laptop for Work and Play in 2024
Top 13 Best Smartphones of 2024: Comparison & Review

The Rise of Quantum Computing: What You Need to Know in 2024

How 5G is Revolutionizing Internet Speeds and Connectivity

Wearable Tech in 2024: The Latest Gadgets and Innovations

Virtual Reality in Education: How VR is Changing the Way We Learn

The Future of Electric Cars: What’s New in 2024?

Creating Engaging And Relevant Content As A Literacy Influencer
What Are the Differences Between WP Rocket, RocketCDN and Cloudflare
Know About the New Upcoming Mobile Phones

Why is Content Workflow Software Necessary for Content Production
How to Write a Blog Post in 3 Easy Steps with AI
How to back up your iPhone or iPad in 2021 – 7 Easy Steps
Top: 19 Best Mobile Phone Brands in the World
Convenient and Affordable Mobile Crack Screen Repair in the UK.
13 Possible Reasons Why Your Google Ads Are Not Showing Up
WordPress: How to Fix ‘Add New Plugin Menu Not Showing
How to Fix a DST Root CA X3 on your Mac OS? (Expired Certificates)

Check Out The List Of Best CSGO Players 2021

How Should I Style a Brown Jacket? Brown leather jacket styling

6 Common Cybersecurity Myths and How to Address the Concerns

Unlock Content Production with Workflow Management Systems
-
Education1 year ago
Creating Engaging And Relevant Content As A Literacy Influencer
-
 Internet2 years ago
What Are the Differences Between WP Rocket, RocketCDN and Cloudflare
-
 Mobile Phones2 years ago
Know About the New Upcoming Mobile Phones
-
Software1 year ago
Why is Content Workflow Software Necessary for Content Production
-
 Artifiсiаl Intelligenсe3 years ago
How to Write a Blog Post in 3 Easy Steps with AI
-
 Apple3 years ago
How to back up your iPhone or iPad in 2021 – 7 Easy Steps
-
 Phones1 year ago
Top: 19 Best Mobile Phone Brands in the World
-
 Accessories1 year ago
Convenient and Affordable Mobile Crack Screen Repair in the UK.