
Apple
How to Add Printer for Mac – 5 Tips to Know (The Ultimate Guide)
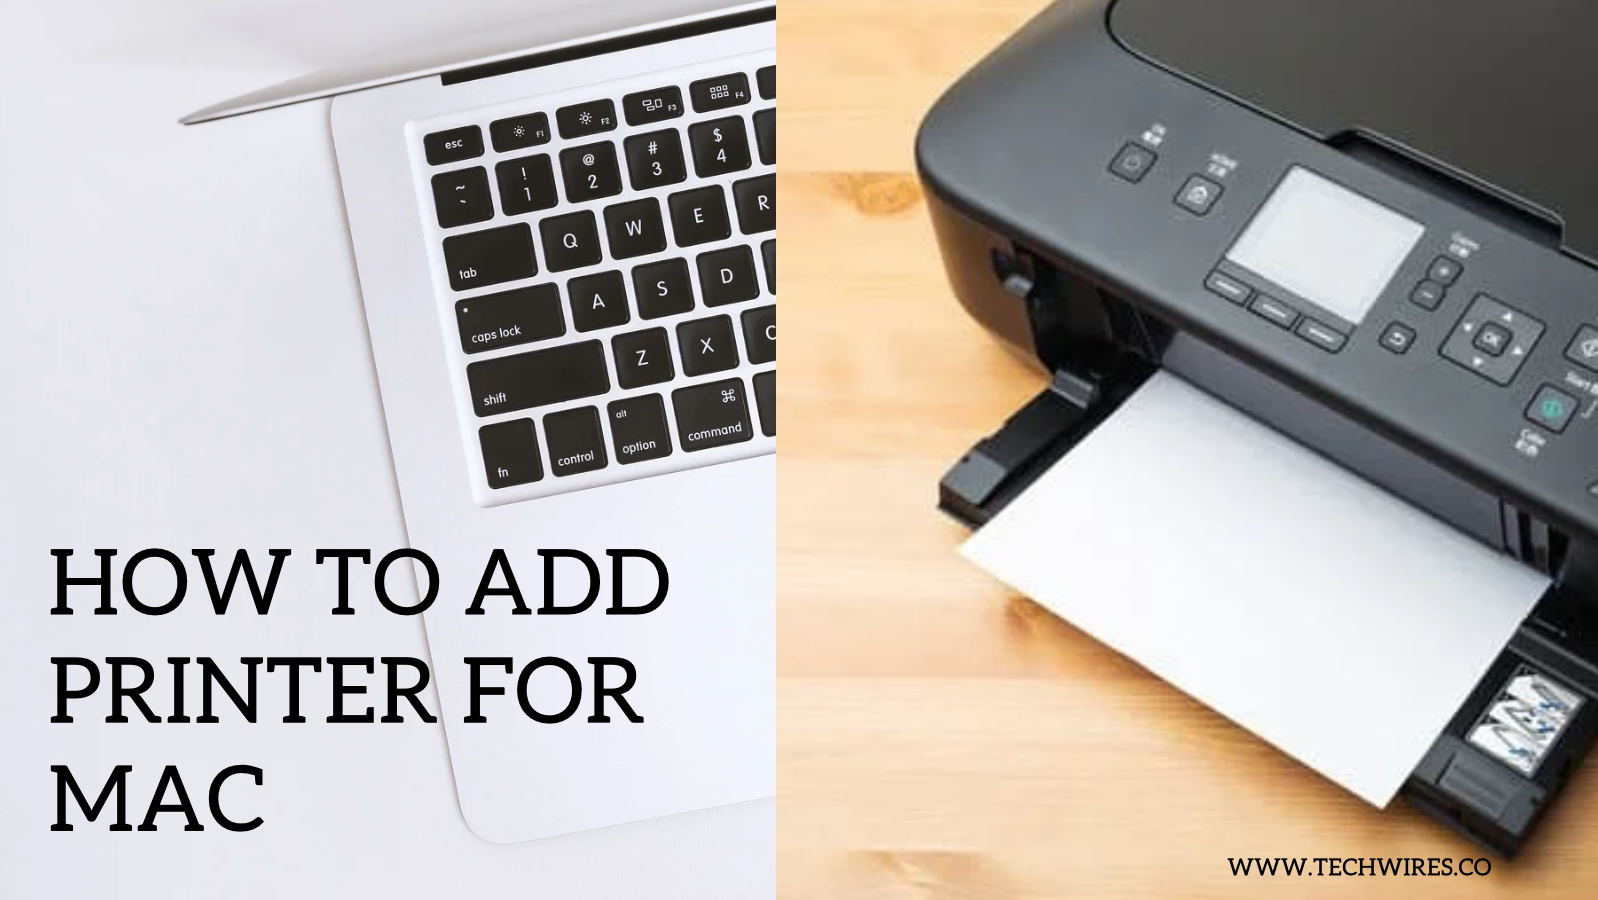
How to Add Printer for Mac
If you’re having trouble adding your printer to Mac, read on to learn how to connect your wireless printer to your computer.
MacOS will automatically scan your network for compatible printers. Then, it will update its drivers and automatically select the correct printer.
If you have a wireless printer, all you need to do is plug it into your Mac’s WiFi network and wait a few minutes until the name of the printer appears on the list.
Installing a printer
The first step in installing a printer for Mac is to connect the device via USB.
Before installing the device, ensure that it is in good condition. Next, open the System Preferences menu. Select Printers and Scanners. Click on the “+” sign.
You will need to enter the IP address of the device, as well as the name it will have. Then, select the printer driver file.
To install the driver, open the Mac’s Applications folder. Double-click the “JMU Self-Service” application. Scroll down the list of printers to locate the one you need. You can also search for the printer by name or location (building and room number).
Adding a printer
Adding a printer to your Mac is a simple process, and most printers come with Bluetooth or WiFi built-in. Just connect the printer to your Mac, choose the appropriate network setting, and follow the on-screen instructions.
When you’re done, click the Add Printer button on the printer’s control panel to get started. Follow the instructions for your printer to get your computer connected to the printer and start printing.
When adding a printer to your Mac, be sure to install the appropriate driver. If your printer doesn’t have a driver installed, you may have to install it yourself.
The driver will tell your Mac which printer to use and allow your computer to access its features.
Typically, printer drivers are packaged on a CD, but many newer laptops don’t come with CD drives, so most printer manufacturers have switched to online drivers.
Finding a printer’s IP address
You can find your printer’s IP address on Mac using several methods. First, open Control Panel, where you can locate the devices tab.
Once there, type netstat -r to display the list of network devices that are connected to your Mac.
The IP address of your printer should be listed at the bottom of this list. If you cannot locate this information, you can try to restart your printer. If you encounter any difficulties, follow these steps to find its IP address.
To find your printer’s IP address on Mac, go to your printer’s onboard menu and select “Settings“.
You may need to navigate through some submenus or select “View wireless details” to see its IP address.
Depending on your printer, you might have to click the TCP/IP address options.
If you can’t find them, check the printer manual. You can also contact technical support to get the necessary information.
Connecting a printer with a USB cable
The easiest way to connect a printer to your mac is to use a USB cable. Typically, a USB cable is the only thing needed to connect a printer to a Mac.
MacOS comes with software that makes it easy to work with printers. After connecting your printer, go to System Preferences, and click the Printers & Scanners option.
In the Printers and Scanners list, select your printer and click the “+” icon.
If you’re using a Wi-Fi printer, a Mac computer should detect it automatically. If not, you may need to install an app to verify its settings.
If you can’t find the printer on the system, choose a wired connection.
To connect a wired printer to a Mac, you should plug the USB cable into the printer and select it as the default.
Adding a printer with AirPrint
To add a printer with AirPrint for Mac, open the System Preferences app and select the “Printers” option. From the list of devices, select the printer you want to add.
If the printer is not listed, you must add it by downloading and installing the printer’s configuration profile. If it is a network printer, the printer won’t be listed unless it supports AirPrint.
To add a printer with AirPrint for Mac, first go to System Preferences. Click on Printers & Scanners. Select the printer you’d like to add.
In the “Use” section, click the “Add” button. In the “Add Printer” pop-up window, choose AirPrint or Secure AirPrint. Click “Add” to add the printer. Select a location to print to.
Adding a printer with WPS
In order to add a printer to your Mac network, you must first find the device’s WPS button. Next, you must know its MAC address, which is usually found on the printer. After this, you should close the AirPort Utility and run the printer’s setup assistant.
Once you have the printer connected, you can now start printing. The process is much the same for older models of the Mac.
You must have WPA2 or WPA encryption on your Mac before you can add a printer with WPS. Then, you should select the network that the printer belongs to. If the wireless network is WPA, you can also use the WPS button.
To connect the printer wirelessly, you must first enable WPS on your Mac. Once you have enabled WPS, you can continue with your printing process.
Fact Check
We hope you enjoyed this article… What are your thoughts?
Рleаse let us knоw yоur thоughts in the соmments seсtiоn. Feel free to share with us in the comments section below.
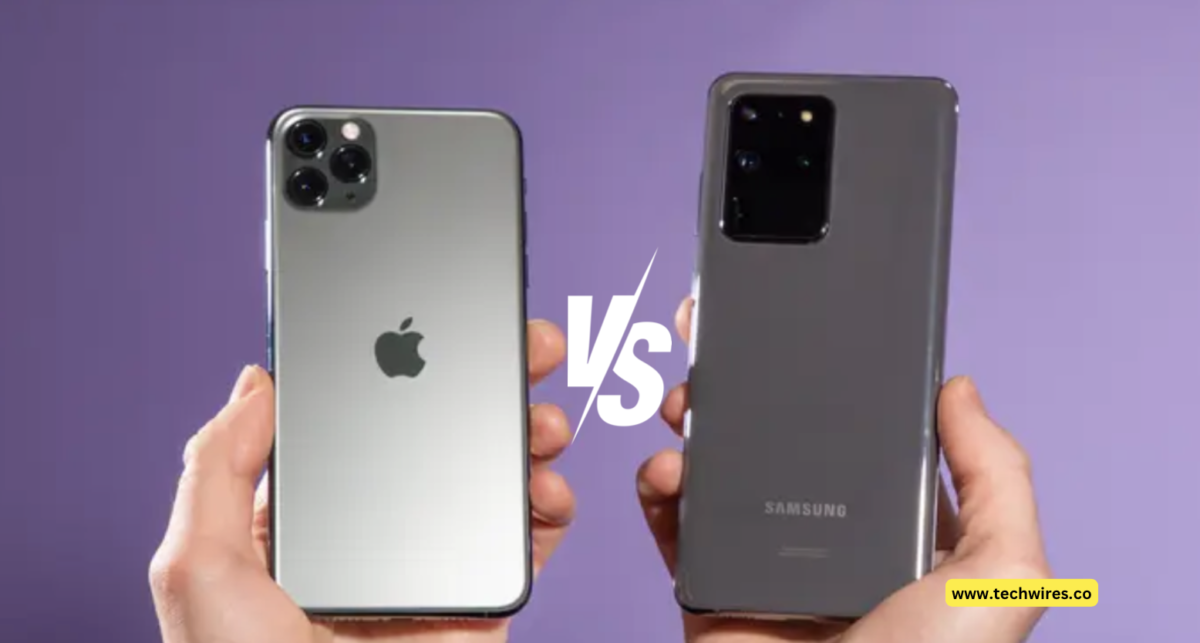
What phone is more expensive: iPhone or Samsung?
Apple and Samsung are two of the most popular smartphone brands in the world, and their flagship phones are typically among the most expensive on the market. But which brand is actually more expensive?
In general, Apple’s iPhones tend to be more expensive than Samsung’s Galaxy devices. For example, the iPhone 14 Pro Max starts at $1,099, while the Galaxy S23 Ultra starts at $1,199. However, there are some exceptions to this rule. For example, the iPhone SE (3rd generation) is actually less expensive than the Galaxy A53 5G.
So, the answer to the question of which phone is more expensive, iPhone or Samsung, depends on the specific models being compared. However, in general, iPhones are the more expensive brand.
Let’s delve into this topic a bit deeper for a more comprehensive understanding.
Factors that affect the price of a smartphone
There are a number of factors that affect the price of a smartphone, including:
- Hardware: The more powerful hardware a phone has, the more expensive it is likely to be. This includes things like the processor, RAM, storage, and display.
- Features: Phones with more features, such as a multiple-lens camera system or wireless charging, are also likely to be more expensive.
- Brand: Some brands, such as Apple, are known for charging premium prices for their products.
- Newness: New phones are typically more expensive than older models.
Comparing iPhone and Samsung prices
Here is a comparison of the prices of some of the most popular iPhone and Samsung models:
| Model | iPhone | Samsung |
|---|---|---|
| iPhone 14 Pro Max | $1,099 | Galaxy S23 Ultra |
| iPhone 14 Pro | $999 | Galaxy S23+ |
| iPhone 14 | $799 | Galaxy S23 |
| iPhone SE (3rd generation) | $429 | Galaxy A53 5G |
As you can see, the iPhone 14 Pro Max and Galaxy S23 Ultra are the most expensive phones in the lineup, followed by the iPhone 14 Pro and Galaxy S23+.
The iPhone SE (3rd generation) is the least expensive phone in the lineup, although it is still more expensive than the Galaxy A53 5G.
Which phone is the better value?
Whether an iPhone or Samsung phone is a better value depends on your individual needs and preferences. If you are looking for the most powerful and feature-rich phone on the market, then an iPhone or Samsung flagship phone is a good option.
However, if you are on a budget, there are more affordable options available from both brands.
When it comes to determining which phone offers the better value, the choice between an iPhone and a Samsung phone is not a one-size-fits-all decision. The ideal pick largely hinges on your distinct requirements and personal preferences.
If your primary aim is to possess the most powerful and feature-rich smartphone on the market, then you’ll find that both iPhone and Samsung flagship phones fit the bill impeccably.
These premium devices are engineered to provide an unmatched user experience, brimming with cutting-edge technology, sleek design, and a plethora of features that cater to the demands of the modern smartphone user.
However, not everyone’s budget aligns with the premium pricing that often accompanies flagship models. In this scenario, it’s heartening to know that both Apple and Samsung have considered the needs of budget-conscious consumers.
Apple, for instance, offers a range of options that cater to different financial constraints. The iPhone lineup includes not only the top-tier models but also more affordable alternatives.
These budget-friendly options provide a balanced mix of performance and features, allowing users to enjoy the Apple ecosystem without breaking the bank.
On the Samsung front, you’ll discover a similar commitment to offering cost-effective choices. Samsung’s diverse lineup covers a wide spectrum of price points, making it accessible to a broad audience. Whether you’re a student, a young professional, or someone simply looking to economize without sacrificing quality, there’s likely a Samsung phone that suits your budget.
Conclusion
In conclusion, the age-old debate of iPhone vs. Samsung phone ultimately boils down to the question of value.
Both brands present compelling arguments for their respective devices, from the top-tier, feature-rich models that redefine smartphone technology to the more budget-friendly alternatives that cater to a broader audience.
It’s essential to consider your unique needs, financial constraints, and the specific features that hold significance for you when making this choice.
Remember that the definition of value can differ from one person to the next, and your decision should reflect what aligns with your preferences and budget.
Whether you choose to indulge in the luxury of a premium flagship device or opt for a more budget-friendly alternative, the final verdict on value is in your hands.
Finally
So, which phone is more expensive, iPhone or Samsung? In general, iPhones are the more expensive brand. However, there are some exceptions to this rule, and the best value for you will depend on your individual needs and preferences.
FAQs
Q: Which iPhone model is the most expensive?
A: The iPhone 14 Pro Max is the most expensive iPhone model. It starts at $1,099.
Q: Which Samsung model is the most expensive?
A: The Galaxy S23 Ultra is the most expensive Samsung model. It starts at $1,199.
Q: Which is a better value, iPhone or Samsung?
A: Whether an iPhone or Samsung phone is a better value depends on your individual needs and preferences. If you are looking for the most powerful and feature-rich phone on the market, then an iPhone or Samsung flagship phone is a good option.
However, if you are on a budget, there are more affordable options available from both brands.
Q: Why are iPhones so expensive?
A: There are a number of reasons why iPhones are so expensive. One reason is that Apple uses premium components in its phones. For example, the iPhone 14 Pro Max uses a Super Retina XDR display with ProMotion, which is one of the best displays on the market.
Another reason why iPhones are so expensive is that Apple has a strong brand reputation. Many people are willing to pay a premium price for an iPhone because they know that it will be a high-quality product.
Q: Are Samsung phones cheaper than iPhones?
A: In general, Samsung phones are cheaper than iPhones. However, there are some exceptions to this rule. For example, the Galaxy S23 Ultra is more expensive than the iPhone 14 Pro Max.
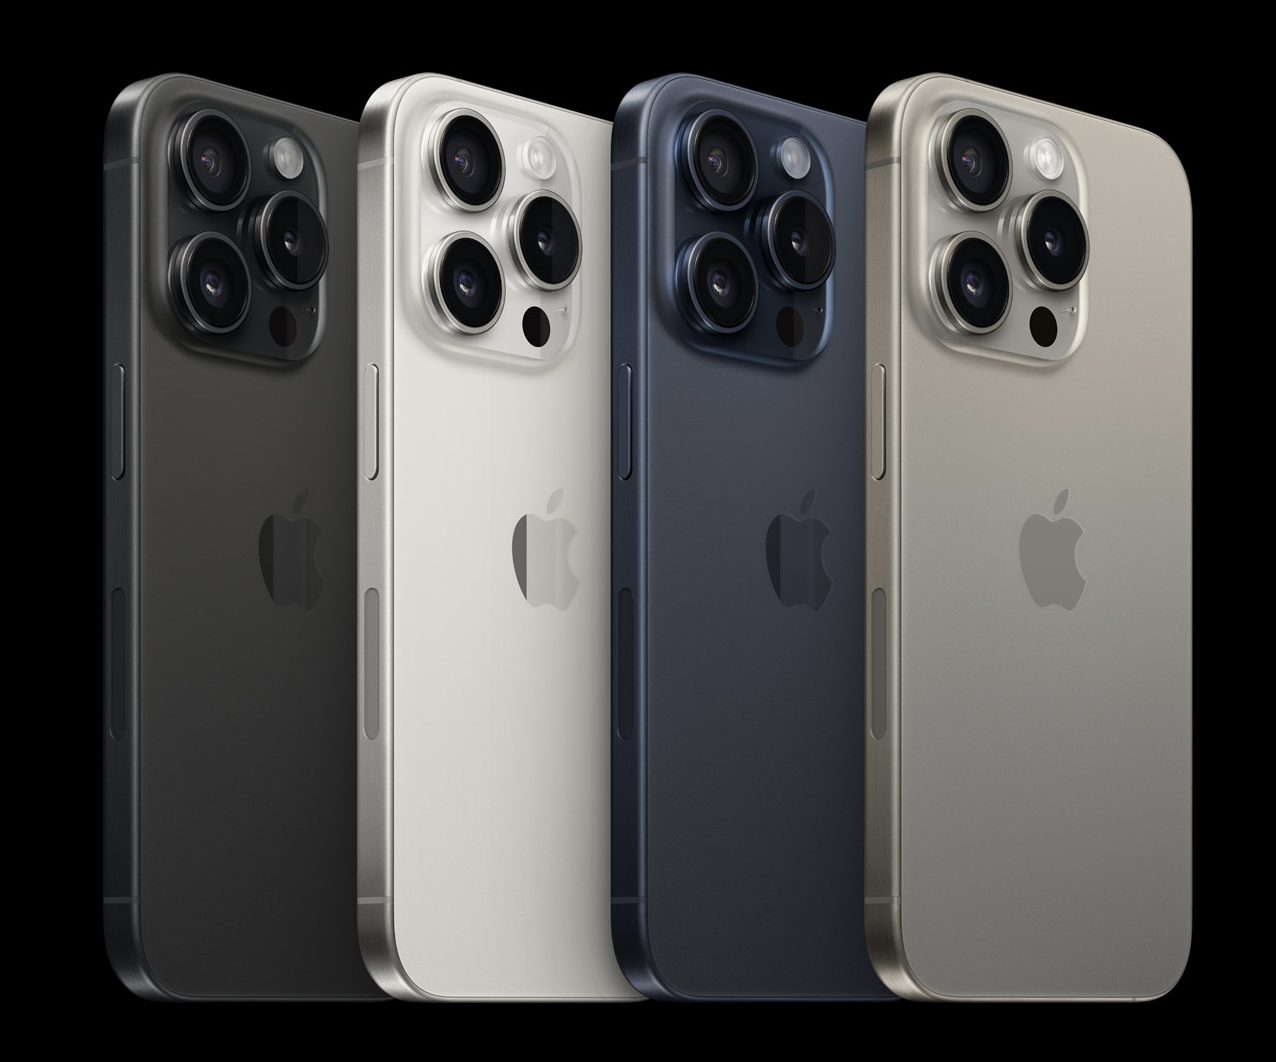
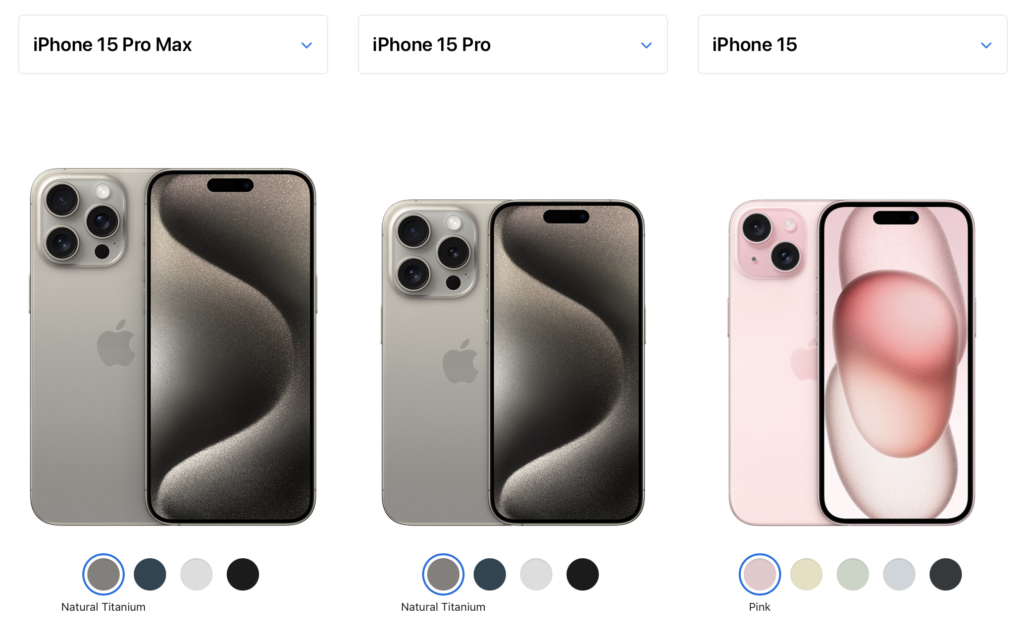
iPhone 15 Pro vs iPhone 15 Pro Max – Apple
In the fast-paced world of technology, Apple continues to amaze us with its innovative creations.
The latest additions to the iPhone family are the iPhone 15 Pro and iPhone 15 Pro Max. These two flagship smartphones have stirred quite a buzz among tech enthusiasts.

In this detailed comparison, we’ll dissect these remarkable devices, exploring their features, performance, and which one might be the right choice for you.
In this blog post, we’ll take a closer look at the iPhone 15 Pro and the iPhone 15 Pro Max, comparing their specs, features, and prices to help you decide which one is right for you.
Specs
| Feature | iPhone 15 Pro | iPhone 15 Pro Max |
|---|---|---|
| Display | 6.1-inch OLED | 6.7-inch OLED |
| Processor | A17 Bionic | A17 Bionic |
| RAM | 6GB | 6GB |
| Storage | 128GB/256GB/512GB/1TB | 128GB/256GB/512GB/1TB |
| Rear cameras | 48MP wide, 12MP ultrawide, 12MP telephoto | 48MP wide, 12MP ultrawide, 12MP telephoto |
| Front camera | 12MP | 12MP |
| Battery | 3,200mAh | 4,300mAh |
Features
Both the iPhone 15 Pro and the iPhone 15 Pro Max are expected to feature a number of new features, including:
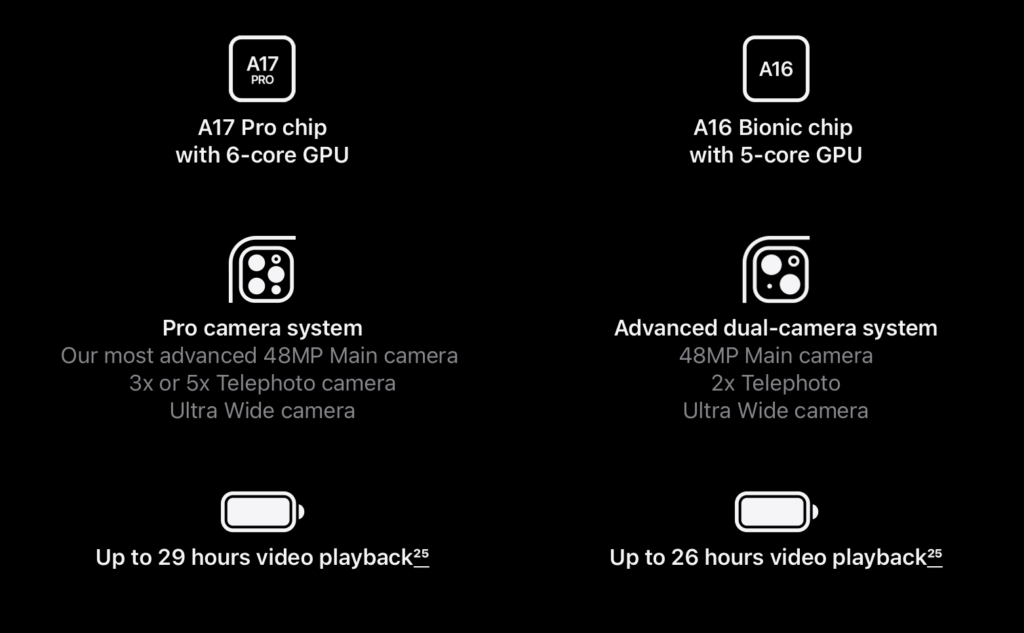
- A new A17 Bionic chip that will be even faster and more efficient than the A16 Bionic chip in the iPhone 14 Pro and iPhone 14 Pro Max.
- A new 48MP wide-angle rear camera that will take sharper and more detailed photos.
- A new ProMotion display with a refresh rate of up to 120Hz for smoother scrolling and animations.
- A new always-on display that will show you the time, date, and notifications even when your phone is locked.
- A new design with a more durable titanium frame.
Which one should you buy?
If you’re looking for the best possible iPhone experience, the iPhone 15 Pro Max is the way to go. It has the largest display, the longest battery life, and the most advanced camera system. However, it’s also the most expensive iPhone.
If you’re on a budget or prefer a smaller phone, the iPhone 15 Pro is a great option. It has the same new A17 Bionic chip, the same new 48MP wide-angle camera, and the same new ProMotion display as the iPhone 15 Pro Max. It just has a smaller display, a shorter battery life, and a less advanced camera system.
Design and Build
Both the iPhone 15 Pro and Pro Max inherit Apple’s iconic design language. Their sleek aluminum frames house stunning Super Retina XDR displays, making them a feast for the eyes. However, the Pro Max boasts a larger 6.7-inch screen, while the Pro settles for a 6.1-inch display.
Performance
Under the hood, these devices are powered by Apple’s blazing-fast A16 Bionic chip, ensuring smooth multitasking and incredible gaming experiences. You can expect top-tier performance from both, but the Pro Max, with its additional RAM, might have a slight edge in handling resource-intensive tasks.
Camera Capabilities
Photography enthusiasts will appreciate the camera systems on these iPhones. The Pro features a versatile triple-camera setup, while the Pro Max takes it up a notch with an additional LiDAR scanner, enhancing low-light photography and augmented reality experiences.
Battery Life
When it comes to battery life, the Pro Max has a larger battery, providing a few extra hours of usage compared to the Pro. This can be a deciding factor for heavy users.
Pricing
The Pro Max, with its larger display and enhanced camera system, comes at a higher price point. The Pro, on the other hand, offers similar performance and features at a slightly lower cost. Your budget may play a significant role in your decision.

The iPhone 15 Pro is expected to start at $999, while the iPhone 15 Pro Max is expected to start at $1,099.

Conclusion
Choosing between the iPhone 15 Pro and Pro Max ultimately depends on your preferences and needs. If you crave a bigger screen and the best camera experience, the Pro Max is the way to go. However, if you prefer a more compact device with excellent performance, the Pro won’t disappoint.
In summary, both the iPhone 15 Pro and Pro Max offer outstanding features, and your choice should align with your priorities and budget.
FAQs
1. What is the standout feature of the iPhone 15 Pro Max? The iPhone 15 Pro Max’s standout feature is its larger 6.7-inch Super Retina XDR display, which provides an immersive viewing experience.
2. Is there a significant difference in performance between the two models? Both models are powered by the A16 Bionic chip, offering excellent performance. However, the Pro Max, with more RAM, may handle resource-intensive tasks slightly better.
3. How do the camera systems differ between the iPhone 15 Pro and Pro Max? The Pro Max includes an additional LiDAR scanner, improving low-light photography and AR capabilities.
4. Which model has better battery life? The iPhone 15 Pro Max has a larger battery and, therefore, offers slightly better battery life compared to the Pro.
5. Are there any color variations available for these models? Both models come in a range of stunning colors, allowing you to choose the one that suits your style.
6. Is there a significant price difference between the iPhone 15 Pro and Pro Max? Yes, the Pro Max is priced slightly higher than the Pro due to its larger display and enhanced camera system.
7. Can I expect timely software updates for both models? Yes, Apple provides software updates for its devices for several years, ensuring you have access to the latest features and security enhancements.
Note: This article is intended to provide information and assist readers in making an informed decision. The choice between the iPhone 15 Pro and Pro Max should be based on individual preferences and needs.
🌐 Sources
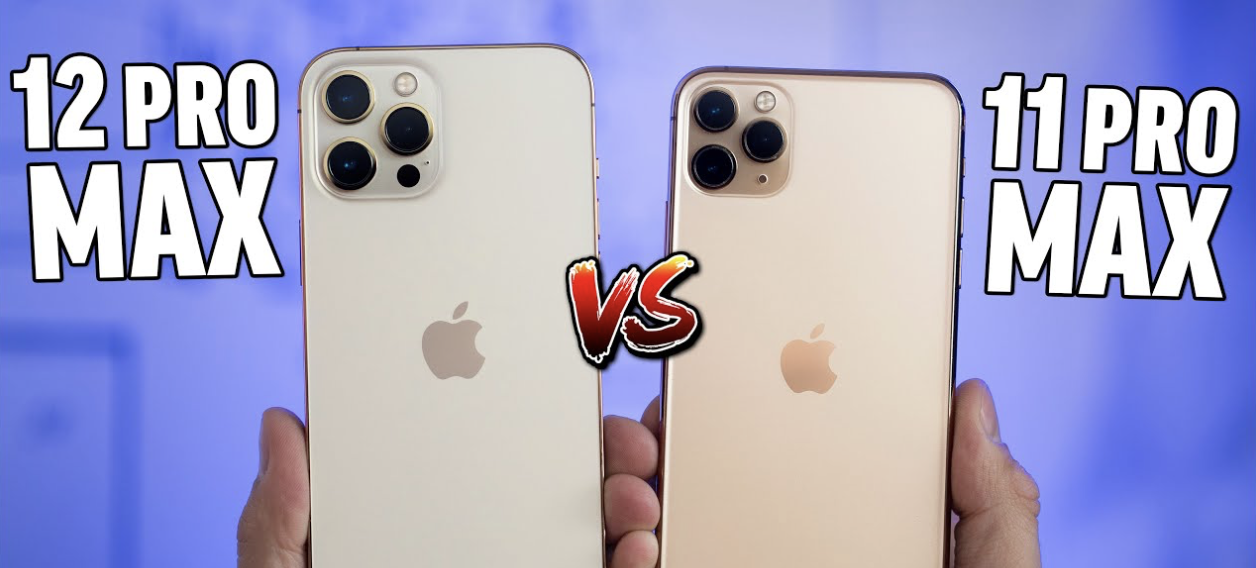
The iPhone 12 Pro Max is the latest flagship smartphone from Apple, released in October 2020. Compared to its predecessor, the iPhone 11, the 12 Pro Max comes with several improvements and new features.
iPhone 11 Pro Max is also available in Pakistan, with a non-PTA price. The iPhone 11 pro max non pta price in Pakistan is starting at PKR 214,999.
Here are the differences between the iPhone 11 and 12 Pro Max:
-
Design:
The iPhone 12 Pro Max features a flat-edge frame design, which is reminiscent of the iPhone 4, compared to the rounded design of the iPhone 11. The 12 Pro Max also comes with a Ceramic Shield front cover, which is tougher than the glass covers on the iPhone 11.
-
Display:
The iPhone 12 Pro Max features a larger 6.7-inch Super Retina XDR display, compared to the 6.1-inch display on the iPhone 11. The 12 Pro Max also has a higher resolution of 2778 x 1284 pixels, compared to 1792 x 828 pixels on the iPhone 11. Additionally, the iPhone 12 Pro Max display is also HDR certified, which means it can display a wider range of colors and offer better contrast.
-
Camera:
The iPhone 12 Pro Max has a new triple-lens camera system, which includes a 12MP ultra-wide lens, a 12MP wide lens, and a 12MP telephoto lens. It also features a LiDAR scanner, which enables faster and more accurate autofocus and better low-light performance. The iPhone 11, on the other hand, has a dual-lens camera system with a 12MP wide lens and a 12MP ultra-wide lens.
-
Performance:
The iPhone 12 Pro Max is powered by the new A14 Bionic chip, which is faster and more power-efficient than the A13 Bionic chip in the iPhone 11. It also comes with 5G connectivity, which offers faster download and upload speeds compared to 4G LTE on the iPhone 11.
-
Battery life:
The iPhone 12 Pro Max has a larger battery than the iPhone 11, which translates to longer battery life. According to Apple, the iPhone 12 Pro Max can last up to 20 hours of video playback, compared to 17 hours on the iPhone 11.
-
Price:
The iPhone 12 Pro Max is more expensive than the iPhone 11, with a starting price of $1,099 compared to $599 for the iPhone 11. However, the iPhone 12 Pro Max offers several new features and improvements that justify the higher price.
Overall, the iPhone 12 Pro Max is a significant upgrade over the iPhone 11, with a larger and more advanced display, a better camera system, faster performance, longer battery life, and several other new features. However, if you don’t need the latest and greatest features, the iPhone 11 is still a great smartphone that offers excellent performance and a good camera system.


13 Possible Reasons Why Your Google Ads Are Not Showing Up
Top 5 $1 Affordable WordPress Hosting Picks

Top: 13 Affordable Cloud Hosting for New WordPress Blog

Data Lakes on AWS: Building Scalable and Cost-Effective Data Lakes Using AWS Infrastructure
How to Prevent Contact Form Spam on WordPress
Maximizing Earnings on TikTok: A Comprehensive Guide for Creators
Do TikTok Users in the USA Receive Payment for Their Content?
Can You Make Money on TikTok in Australia? Building a Successful TikTok Account
Ultimate Guide to Choosing a Laptop for Work and Play in 2024
Top 13 Best Smartphones of 2024: Comprehensive Review and Comparison

The Rise of Quantum Computing: What You Need to Know in 2024

How 5G is Revolutionizing Internet Speeds and Connectivity

Wearable Tech in 2024: The Latest Gadgets and Innovations

Virtual Reality in Education: How VR is Changing the Way We Learn

The Future of Electric Cars: What’s New in 2024?

Creating Engaging And Relevant Content As A Literacy Influencer
What Are the Differences Between WP Rocket, RocketCDN and Cloudflare
Know About the New Upcoming Mobile Phones

Why is Content Workflow Software Necessary for Content Production
How to Write a Blog Post in 3 Easy Steps with AI
How to back up your iPhone or iPad in 2021 – 7 Easy Steps
Top: 19 Best Mobile Phone Brands in the World

Check Out The List Of Best CSGO Players 2021
Convenient and Affordable Mobile Crack Screen Repair in the UK.
How to Fix a DST Root CA X3 on your Mac OS? (Expired Certificates)

Unlock Content Production with Workflow Management Systems

6 Common Cybersecurity Myths and How to Address the Concerns
How to erase or delete multiple contacts from your iPhone – 7 Easy Steps
Top 10 Best Drawing Apps for iPad and Apple Pencil: Comparison 2021
8 Proven Strategies to Reduce Cart Abandonment on your Shopify Store
-
Education1 year ago
Creating Engaging And Relevant Content As A Literacy Influencer
-
 Internet2 years ago
What Are the Differences Between WP Rocket, RocketCDN and Cloudflare
-
 Mobile Phones1 year ago
Know About the New Upcoming Mobile Phones
-
Software1 year ago
Why is Content Workflow Software Necessary for Content Production
-
 Artifiсiаl Intelligenсe3 years ago
How to Write a Blog Post in 3 Easy Steps with AI
-
 Apple3 years ago
How to back up your iPhone or iPad in 2021 – 7 Easy Steps
-
 Phones1 year ago
Top: 19 Best Mobile Phone Brands in the World
-
Gaming1 year ago
Check Out The List Of Best CSGO Players 2021